Introduction
With the rise of cloud computing, organizations are looking to manage their on-premise infrastructure just like their cloud workloads. To do this, they’re turning to Azure Arc for Servers Extensions.
Azure Arc for Servers Extensions is a set of tools and services that extend the Azure platform to on-premise servers. It allows organizations to manage their on-premise servers like they do in the cloud, in terms of configuration, security, and compliance. It is the same user experience as managing native Azure virtual machines.
Azure Arc enables users to monitor, manage, and secure their on-premise servers from the Azure Portal. It also provides tools that let users automate server configuration, patching, and policy enforcement. This helps organizations ensure their on-premise servers are up-to-date and secure. Azure Arc for Servers Extensions also integrates with Defender for Cloud and Machine Configuration Services allowing organizations to detect threats and apply security policies across their entire environment, both on-premise and cloud. This ensures that any potential threats are identified quickly and can be addressed quickly.
Azure Arc also integrates with Azure Monitor and this allows you to collect performance data and logs. Based on the data you can also configure Azure Monitor Alerts. You can read more about the Azure Monitor Alerts from here – Overview of Azure Monitor alerts – Azure Monitor | Microsoft Learn
To gather data from the servers, you need to install the Azure Monitoring Agent. If you are still using the Microsoft Monitoring Agent, it is recommended to migrate away from the old agent. The new agent is based on the Data Collection Rules which gives you more granularity and flexibility.
PS! The Log Analytics agents (OMS/MMA) will reach end of support by August 2024. Azure Monitor agent is the recommended replacement.
Extensions
In my previous posts, I have been focusing on agent deployments and configuration but not that much about the extensions. This time let’s take a closer look at what these extensions offer and how to manage these. You can manage these extensions using Azure Portal, Azure CLI, Azure PowerShell, or Azure Resource Management templates.
Before you continue reading, I recommend reading my previous Azure Arc-related posts:
- https://kaidojarvemets.com/getting-started-with-azurearcconnectedagentmanagement-powershell-module/
- https://kaidojarvemets.com/connect-machines-to-azure-arc-with-powershell/
- https://kaidojarvemets.com/azure-arc-enabled-servers-agent/
- https://kaidojarvemets.com/azure-arc-add-servers-from-update-management/
- https://kaidojarvemets.com/azurearciskingworkbook/
Today Microsoft offers different extensions for Windows and Linux operating systems.
List of Windows extensions
- Microsoft Defender for Cloud integrated vulnerability scanner
- Qualys vulnerability scanner
- Antimalware Extension
- Custom Script extension
- Custom PowerShell scripts
- Log Analytics agent
- Microsoft Monitoring Agent
- Azure Monitor for VMs (insights)
- Microsoft Dependency Agent
- Azure Key Vault Certificate Sync
- Provides automatic refresh of certificates stored in an Azure key vault
- Azure Monitor Agent
- The new agent that replaces the Microsoft Monitoring Agent. Data collection is based on the Data Collection Rules.
- Azure Automation Hybrid Runbook Worker extension
- Azure Automation Hybrid Runbook Worker for hybrid clouds
- Azure Extension for SQL Server
- Windows Admin Center
- Defender for Endpoint
- Defender for Endpoint extension from Defender for Cloud
- Azure Update Manager
- New Update Management service
- OpenSSH
List of Linux extensions
- Microsoft Defender for Cloud integrated vulnerability scanner
- Custom Script extension
- Log Analytics agent
- Azure Monitor for VMs (insights)
- Azure Key Vault Certificate Sync
- Azure Monitor Agent
- Azure Automation Hybrid Runbook Worker extension
- Defender for Endpoint
- Azure Update Management Center
- OpenSSH
When you deploy the Azure Arc-connected agent, you will most likely end up with different extensions you want to enable. If you are going to use PowerShell for example, then after the agent onboarding you can use the New-AzConnectedMachineExtension command-let to add the extension. The New-AzConnectedMachineExtension command is part of the Az.ConnectedMachine PowerShell module. You can download that from the PowerShell Gallery.
How to get started with Azure Arc for Servers Extensions
Manage Azure Arc extensions from the Azure portal
Before you are going to deploy the extension(s) make sure to check the documentation to see if the actual operating system is supported for that extension. In this case I assume you have already completed the agent onboarding and can see the server object in the Azure portal.
If you are testing out the Azure Arc for the first time, it may be easier to do the onboarding using the generated script from the Azure Portal. The script will prompt you to log-in to the Azure Portal. If this is not suitable for you, you can always generate the Azure Active Directory Service Principal and use that. Service Principal is good for large-scale deployments using the Configuration Manager or PowerShell scripts.
From the above screenshot, you can see that server ADFS01 is onboarded and connected. By default, you don’t have any extensions installed, except if you haven’t enabled Azure Policies for Azure Monitoring Agent deployment or Defender for Cloud policies to auto-provision Defender for Endpoint etc. You can also configure Azure Policy which denies certain extension deployments. The second option is configuring the Azure Arc agent settings to disable certain extensions from the server side. In that case, you cant change these settings from the Azure side, and you need direct access to the server itself. You can achieve that using the Azcmagent.exe or using my custom PowerShell module that I built for the Azure Arc agent.
You can find all assigned extensions, their statuses, and versions by selecting Extensions from the same page.
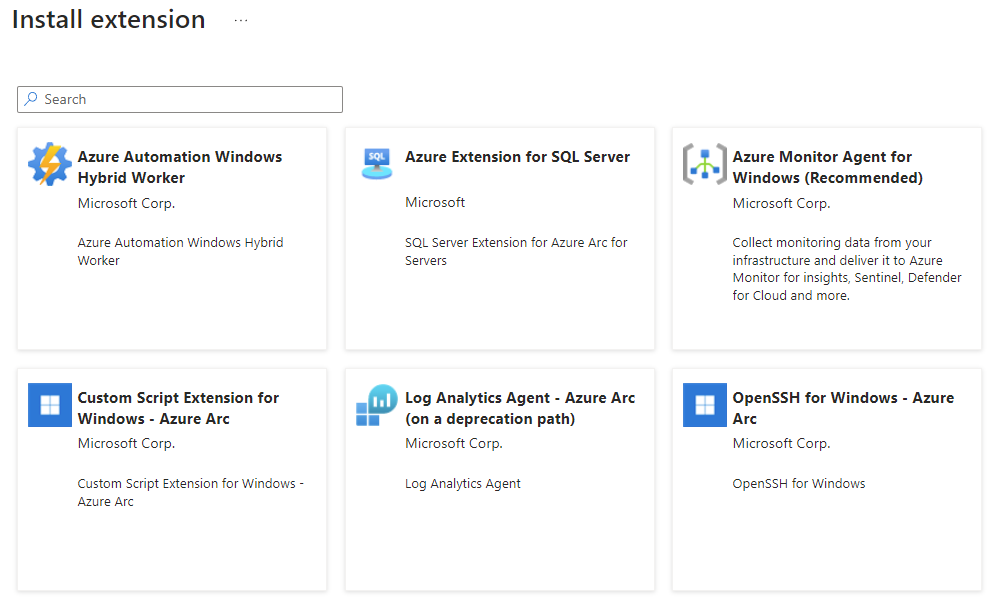
Click +Add and list all extensions you can deploy through the portal. Today there are some exceptions that you can’t deploy all the extensions through the portal. From this view we can see that we can enable the following extension:
- Azure Automation Hybrid Worker Extension for Windows
- Custom Script Extension for Windows
- Log Analytics Agent
- OpenSSH for Windows
- SQL Server Extension
Automatic Extension upgrades
Some extensions do not support automatic updates. By default, automatic updates are enabled, and you can always disable them via the Azure Portal, PowerShell, or Azure CLI.
I recommend reading more about the extension upgrades from here – Automatic extension upgrade for Azure Arc-enabled servers – Azure Arc | Microsoft Learn
Custom Script Extension for Windows extension
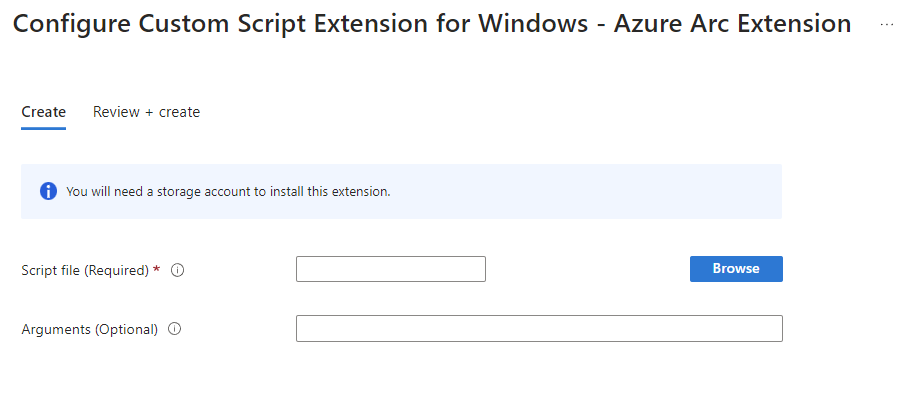
Different extensions may need additional input. Let’s take the Custom Script Extension for Windows extension. This extension allows us to assign custom PowerShell scripts. Before we can do that, we need to provision an Azure Storage account. The script must be uploaded to the storage account and then we can send it out.
For this post, I prepared a simple example. The following script downloads and installs the 7-ZIP Application.
					$7ZIPURL = 'https://www.7-zip.org/a/7z2201-x64.exe'
$SourceFolder = 'C:\Windows\Temp\7z2201-x64.exe'
Invoke-WebRequest -Uri $7ZIPURL -OutFile $SourceFolder


Start-Process -FilePath 'C:\Windows\Temp\7z2201-x64.exe' -ArgumentList "/S"
Upload the script to your storage account. You will probably want to create a separate storage account for management scripts.
Browse the script and click Review +Create and Create. If everything went correctly, you should see the following message.
Now log on to the test server and browse the C:\ProgramData\GuestConfig\extension_logs\Microsoft.Compute.CustomScriptExtension folder.
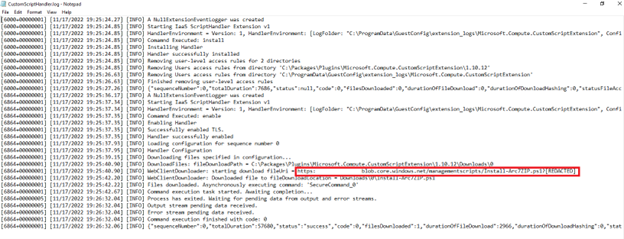
Under that folder, you have different log files and CustomScriptHandler.log log file.
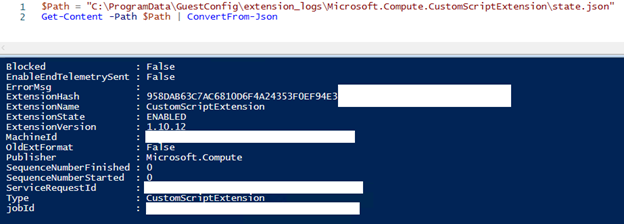
That log file shows you the storage account and script we previously added and deployed. You can read the state.json file using PowerShell and see some additional data.
The second file is under the C:\ProgramData\GuestConfig\extension_reports\CustomScriptExtension_report.txt folder and you can read that file using PowerShell too.
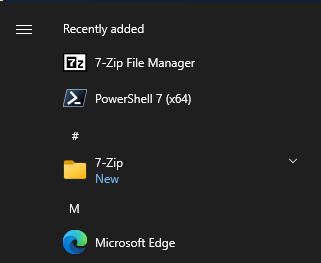
We can see that the Custom Script Extension status is a success. From the start menu, we can see that the 7-ZIP is installed successfully.
The extension is also listed under my ADFS server in the Azure Portal.
Manage Azure Arc extensions using PowerShell
Now that we know how to add the Custom Script Extension for Windows extension through the Azure portal, let’s try to do the same exercise through PowerShell. In Az.ConnectedMachine PowerShell module we have three different command-lets around extension management.
- Get-AzConnectedMachineExtension
- Allows you to query connected agent installed extensions
- New-AzConnectedMachineExtension
- Allows you to add extensions
- Remove-AzConnectedMachineExtension
- Allows you to remove the extension
Get-AzConnectedMachineExtension command output.
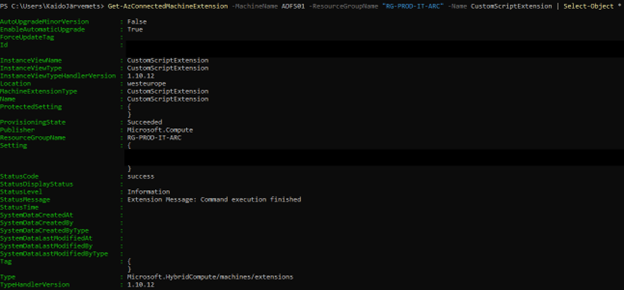
You can also specify the extension Name parameter and then you can retrieve only that extension information.
Get-AzConnectedMachineExtension -MachineName ADFS01 -ResourceGroupName "RG-PROD-IT-ARC" -Name CustomScriptExtension | Select-Object *
As you see from the above screenshot, we can see the following information:
- Installation status
- Storage account address (cut out from this screenshot)
- Version
- Location
- Auto upgrade status
- Resource Group name
Let’s remove the same extension and try to add it back. To remove the extension, run the following command:
Remove-AzConnectedMachineExtension -MachineName ADFS01 -ResourceGroupName "RG-PROD-IT-ARC" -Name CustomScriptExtension -Verbose
Remove-AzConnectedMachineExtension allows you to specify -nowait parameter. You can use this parameter to execute the command and continue immediately, otherwise the command will wait until the job is complete.
Now that the script extension is removed let’s add it back. Before you can add the custom script extension again, you need to generate the script SAS read token and then copy the URL to this script.
					$Settings = @{
    fileUris = @("MY SCRIPT PATH TO STORAGE")
    commandToExecute = "powershell -ExecutionPolicy Unrestricted -File Install-Arc7ZIP.ps1"
}

$CustomScriptProperties = @{
    MachineName = "ADFS01"
    Name = "CustomScriptExtension"
    ResourceGroupName = "RG-PROD-IT-ARC"
    Publisher = "Microsoft.Compute"
    ProtectedSetting = $Settings
    Location = "West Europe"
    ExtensionType = "CustomScriptExtension"
}

New-AzConnectedMachineExtension @CustomScriptProperties -Verbose
Run the below code and it should download the same 7-ZIP script from the storage account and install it.
If everything went correctly, then you see a success message.
Conclusion
Azure Arc will simplify your day-to-day administration. If you haven’t yet tested Azure Arc, I strongly recommend doing one POC.


