Microsoft has evolved its Local Administrator Password Solution, transitioning from the older Microsoft LAPS to the newly integrated Windows LAPS. This advancement streamlines the process for organizations, enabling them to manage local administrator passwords on their workstations and servers more efficiently. The need to separately download and install LAPS has been eliminated, as the latest iteration is seamlessly incorporated into recent Windows updates. This article delves into the steps required to update the Windows Server Active Directory schema in alignment with this new version of Windows LAPS.
Please read my previous blog posts before you continue:
- KQL Queries for Windows LAPS Migration – Kaido Järvemets (kaidojarvemets.com)
- Monitor Windows LAPS Events with Microsoft Sentinel – Kaido Järvemets (kaidojarvemets.com)
- Windows LAPS – New Group Policy Settings – Kaido Järvemets (kaidojarvemets.com)
- Windows LAPS EventIDs and XPath Queries – Kaido Järvemets (kaidojarvemets.com)
- Windows LAPS PowerShell Commands – Kaido Järvemets (kaidojarvemets.com)
- Introducing the New and Improved Windows LAPS: Local Administrator Password Solution – Kaido Järvemets (kaidojarvemets.com)
New Windows LAPS Schema Attributes
| Schema attribute | Description |
| msLAPS-PasswordExpirationTime | This attribute contains a 64-bit integer that specifies the currently scheduled password expiration time in UTC. |
| msLAPS-Password | This attribute contains a Unicode string that specifies the clear-text version of the current password and other information. |
| msLAPS-EncryptedPassword | This attribute contains a byte string that contains an encrypted version of the current password. |
| msLAPS-EncryptedPasswordHistory | This attribute contains a multi-valued byte string. Each value contains an encrypted version of an earlier password. |
| msLAPS-EncryptedDSRMPassword | This attribute contains a byte string that contains an encrypted version of the current Directory Services Restore Mode (DSRM) account password. |
| msLAPS-EncryptedDSRMPasswordHistory | This attribute contains a multi-valued byte string. Each value contains an encrypted version of an earlier DSRM account password. |
Active Directory Domain Requirements for Windows LAPS
Before implementing the Windows LAPS in your Active Directory Domain, it’s crucial to understand the domain functional level and domain controller OS version requirements. If your domain is configured below the 2016 Domain Functional Level (DFL), you won’t be able to enable Windows LAPS password encryption. This means that clients can only be configured to store passwords in clear text, secured by Active Directory ACLs, and DCs can’t be configured to manage their local DSRM account. Once your domain reaches 2016 DFL, you can enable Windows LAPS password encryption.
However, if you’re still running any WS2016 DCs, those WS2016 DCs don’t support Windows LAPS and therefore can’t use the DSRM account management feature. It’s recommended to use supported operating systems older than WS2016 on your domain controllers as long as you’re aware of these limitations.
Read more from Microsoft- Get started with Windows LAPS and Windows Server Active Directory | Microsoft Learn
Step 1: Install the latest updates on your servers and workstations
To begin, ensure that your servers and workstations are running the latest Windows updates. You can do this through Windows Update or by using your organization’s update management system.
Step 2: Confirm LAPS PowerShell module installation
Next, you’ll want to verify if the LAPS PowerShell module is installed. To do this, follow these steps:
- Open PowerShell with administrative privileges
- In the PowerShell window, enter the following command:
Get-Module -Name LAPS
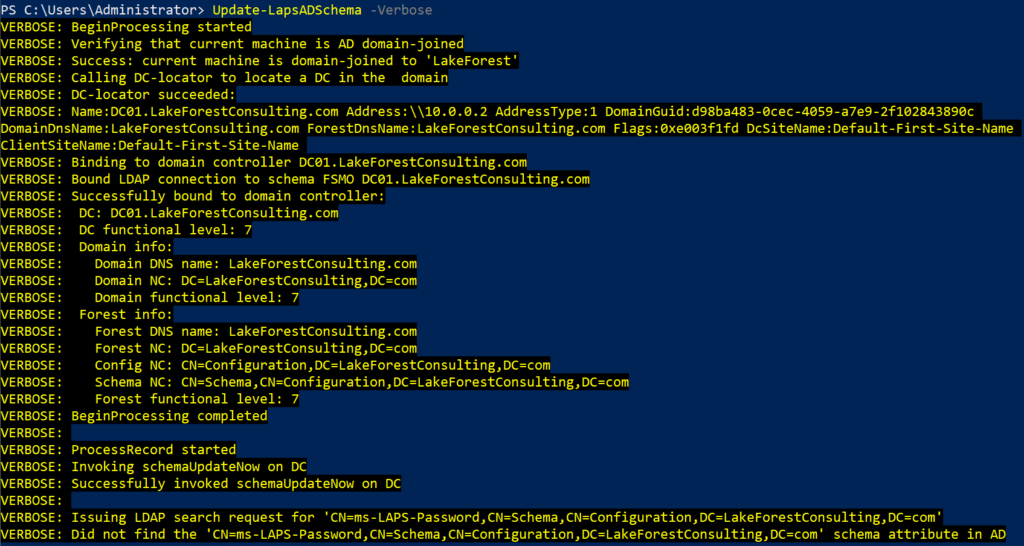
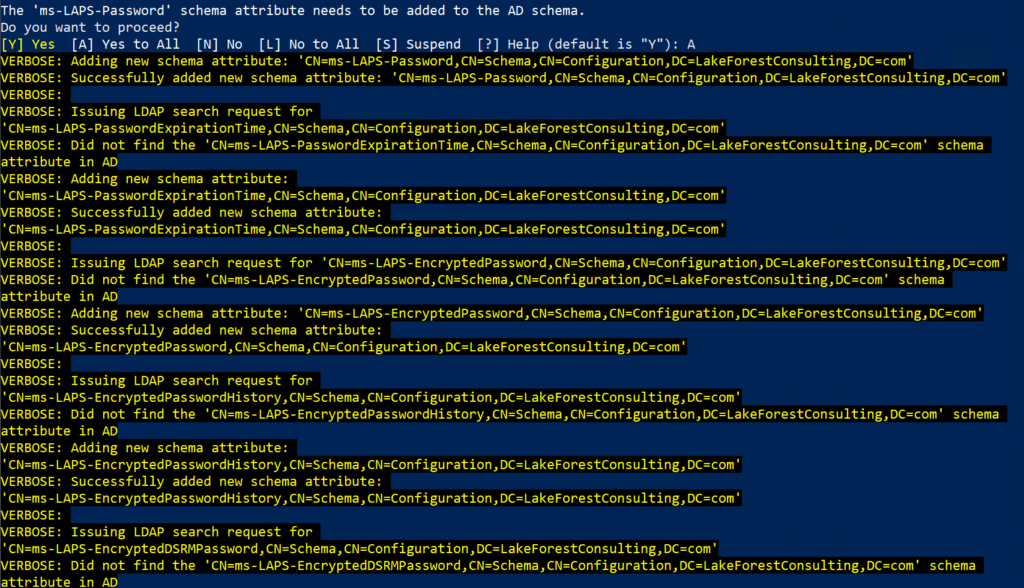
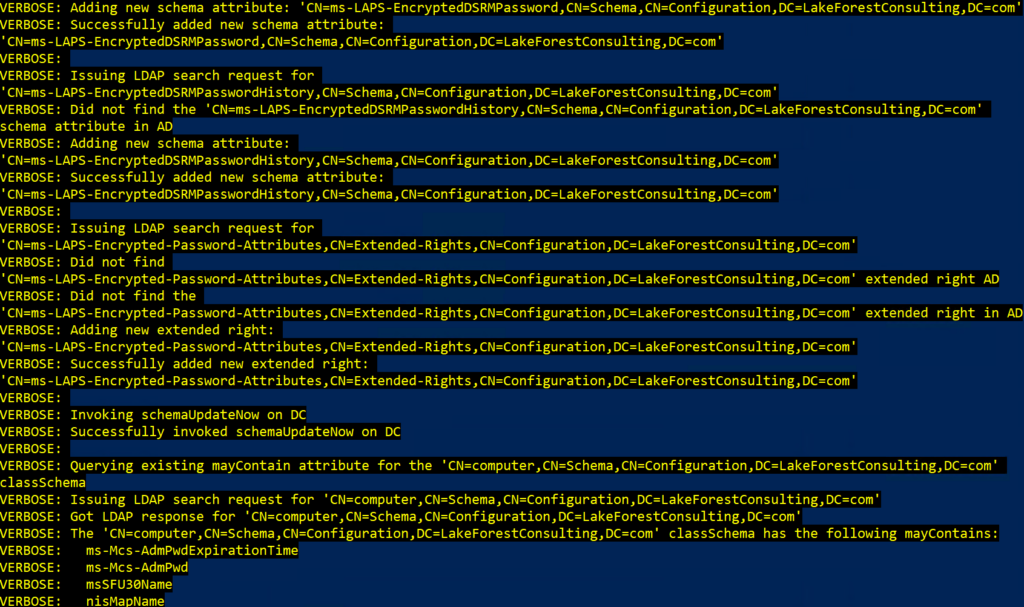
Update-LapsADSchema -Verbose
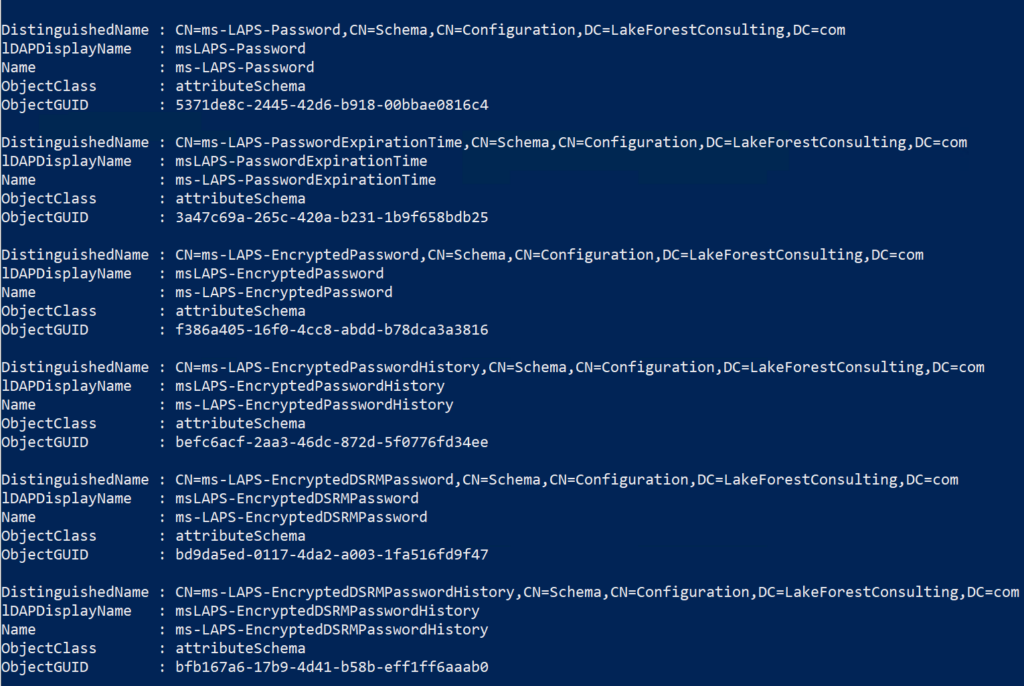
Step 4: Verify the schema update
To confirm that the schema update was successful, enter the following command in the PowerShell window:
Get-ADObject -SearchBase ((Get-ADRootDSE).SchemaNamingContext) -Filter * -Properties lDAPDisplayName | Where-Object { $PSITEM.lDAPDisplayName -eq "msLAPS-Password" -or $PSITEM.lDAPDisplayName -eq "msLAPS-EncryptedPassword" -or $PSITEM.lDAPDisplayName -eq "msLAPS-EncryptedPasswordHistory" -or $PSITEM.lDAPDisplayName -eq "msLAPS-EncryptedDSRMPassword" -or $PSITEM.lDAPDisplayName -eq "msLAPS-EncryptedDSRMPasswordHistory" -or $PSITEM.lDAPDisplayName -eq "msLAPS-PasswordExpirationTime"}
If the schema update was successful, you should see the LAPS schema attributes in the output.
Here is the output from the Update-LapsADSchema PowerShell command:
Conclusion
After successfully updating the schema, you’re set to configure and roll out the evolved Microsoft LAPS, now known as Windows LAPS, across your organization. This updated version not only streamlines the management process but also fortifies the method of handling local administrator passwords. The result is a more secure and systematically organized IT infrastructure.


